The following submenu appears:
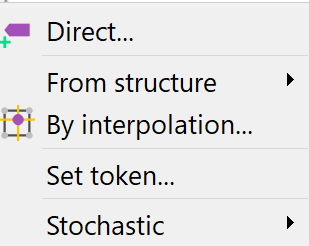
Direct…
With the help of this input window:
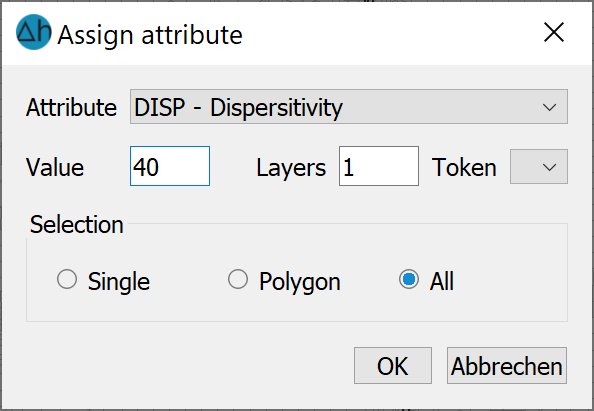
An attribute with a specific value and character can be assigned for nodes or elements, either to all or individuals, in a layer. The desired marker can be selected directly for the MARK attribute.
There is a special feature for the KONT attribute. The following selection window appears during assignment:
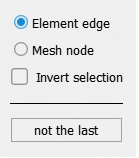
The user can choose whether to assign the control lines using mesh nodes or element edges. Meanwhile, the path of the control line is displayed interactively in the model mesh.
From structure
After selecting a structure using Pick…, List... or All..., the input window with the assignment parameters appears, which has already been explained in detail in the chapter "Assigning structures"..
By interpolation…
Some data is available as gridded or raster data, for example, a digital elevation model with a 5 m grid. In this example, the terrain height must be assigned to each node. However, the position of the model nodes does not correspond to the grid of the elevation model, so that the terrain height data must be interpolated to the nodes. Various methods are available for this purpose.
The input procedure is described in detail in the chapter „Creating a 2D model - interpolation of external data formats".
The theory and the input parameters of the various interpolation algorithms are described in detail in the chapter "Calculations - Interpolation".
The following input window appears.
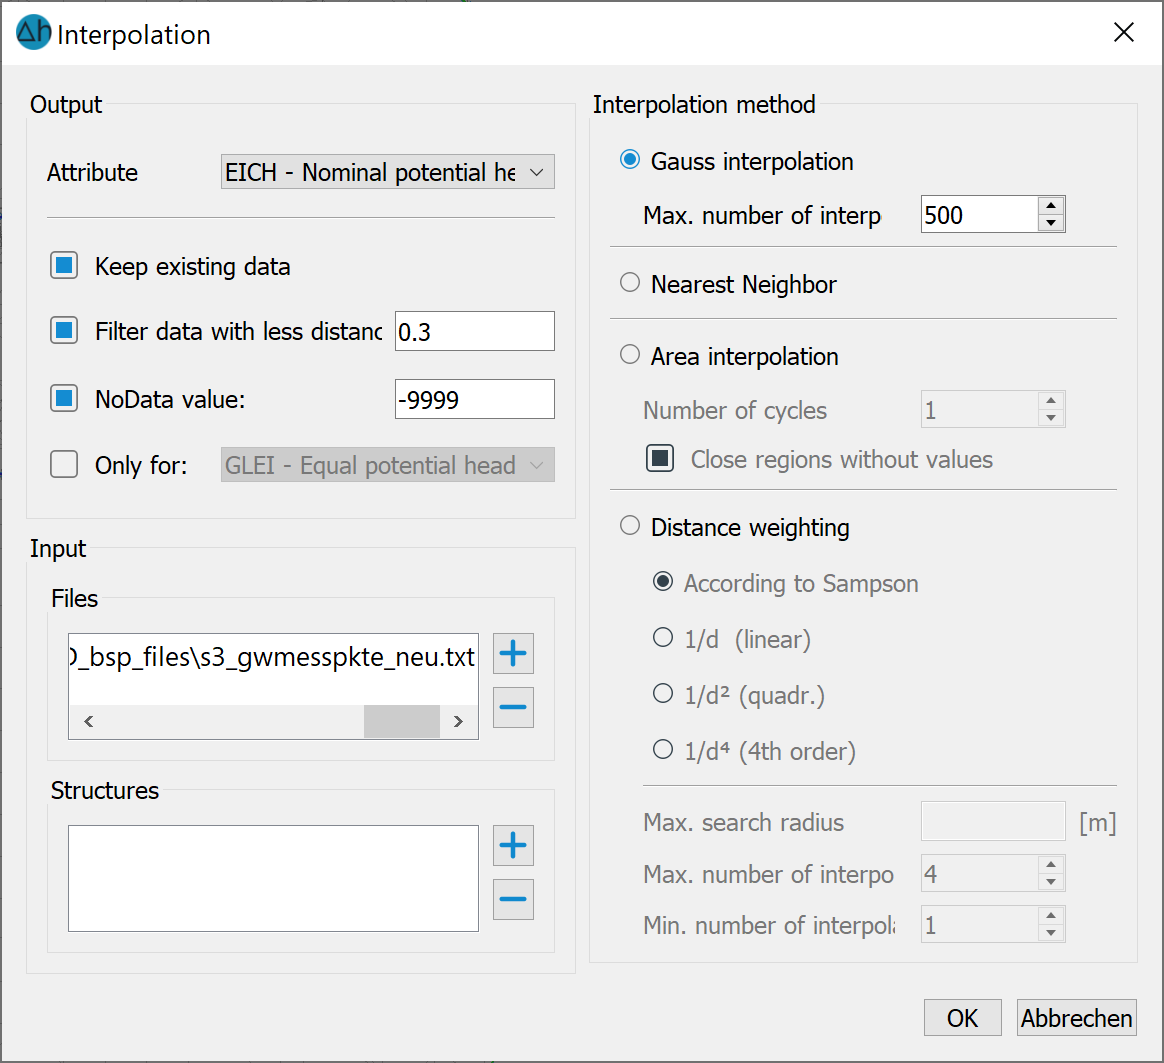
The Nearest Neighbour interpolation method is only available in the Attributes menu. Each node is assigned the value of the nearest interpolation point. For very large amounts of data (raster or Tiff files), the Nearest Neighbour method offers a special input method that significantly reduces memory consumption during interpolation.
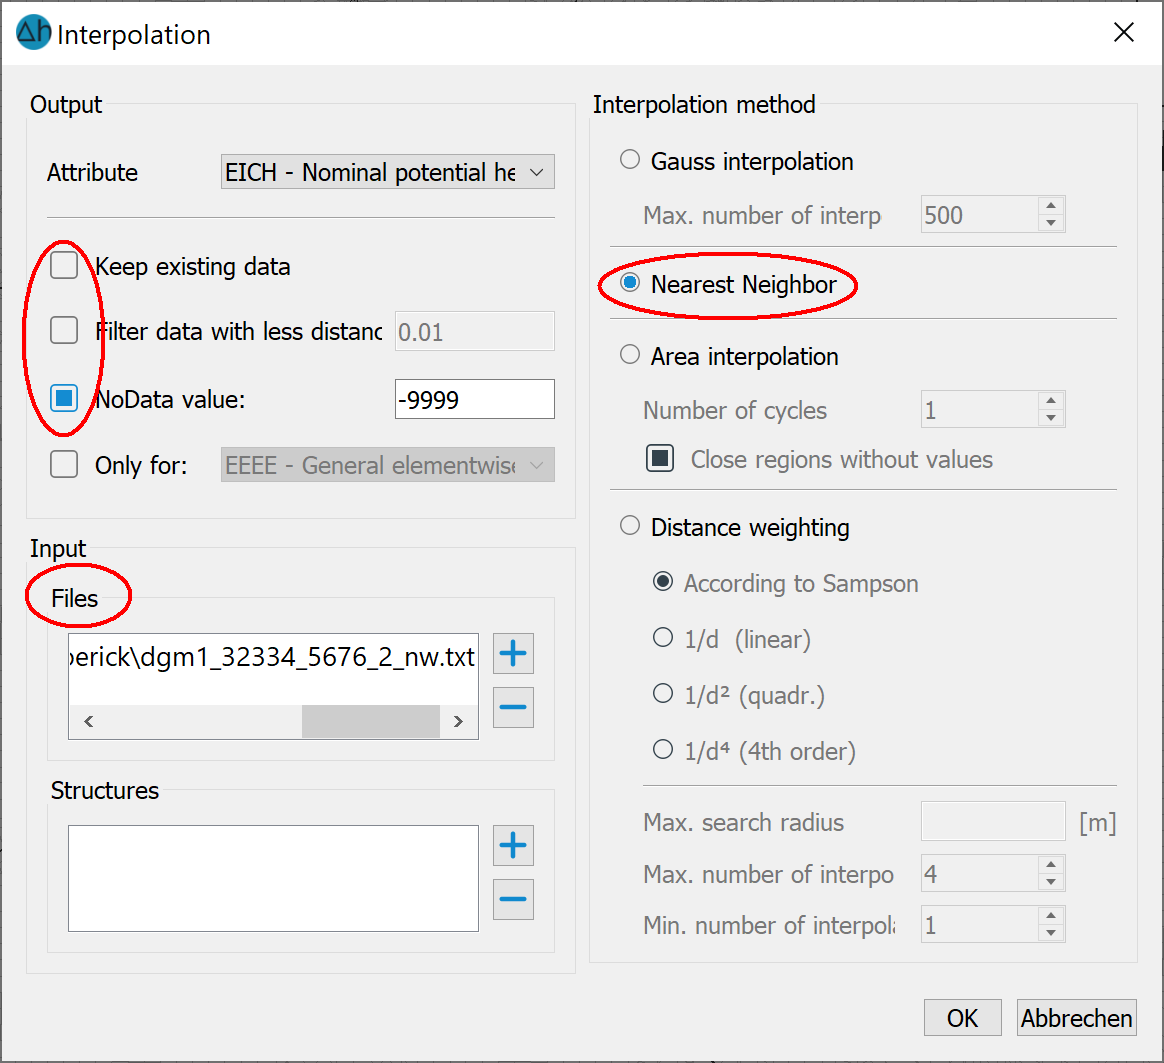
Prerequisites:
Only the "NoData value" checkbox is activated and only files are selected as sources.
In this case, a NoData value is first assigned to the areas outside the raster data, which significantly shortens the interpolation time. In order to assign values to the border areas, the NoData values of the corresponding attribute are deleted in the next step and a new interpolation is carried out under "Consideration of existing data".
Assign token…
When you select this menu item, the following input window appears:
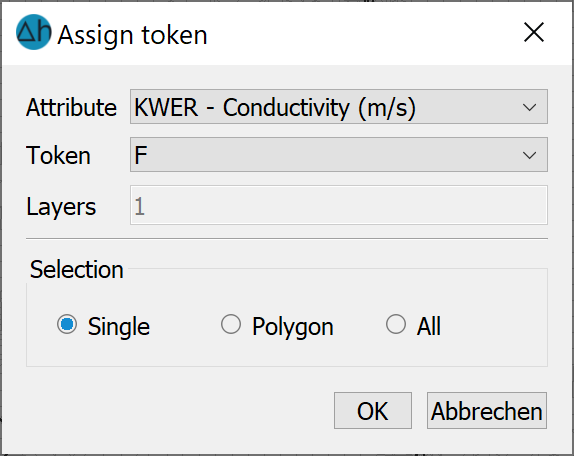
The characters for the 15th and 16th columns of the model data file can be defined or changed here for existing attribute data.
For the identifier, only those data types are displayed for which it makes sense or is possible to set a character.
The character can be selected using the arrow key (/, *, F). You can specify the layer and whether the character should apply to individual nodes or elements, to a specific area or to all nodes or elements.
Stochastic
This menu item can be used to assign an attribute with a specific stochastic distribution to all or individual nodes or elements in a layer. Due to its complexity, this menu item is dealt with in a separate sub-chapter .
 Stochastical assignment of data
Stand: 06.05.2025 | 