As already described in step 1 (regular grid), the minimum and maximum coordinates of the survey area are required to create a new project. Under File  Open... Select the file type Bitmap (*.tif) and open the provided file topo1.tif (located in the tutorial files directory:
".../Tutorial_bsp_files/Tutorial_2D_bsp_files/topo1.tif").
The coordinates of the mouse pointer are displayed in the status bar. The display area of the map can be moved by holding down the centre mouse button. You can zoom in and out by turning the mouse wheel. Press the right mouse button to return to the total view.
The coordinates for the topographic map or the selected model boundary can thus be roughly defined as x = 800, y = 120 for the bottom left-hand corner of the map and x = 7800, y = 6100 for the top right-hand corner of the map.
To create the new model, create a new file either via the launcher dialog (if you closed SPRING) or by using the File New… menu item. Enter the three comment lines and the coordinates determined for the area boundaries in the dialogue:
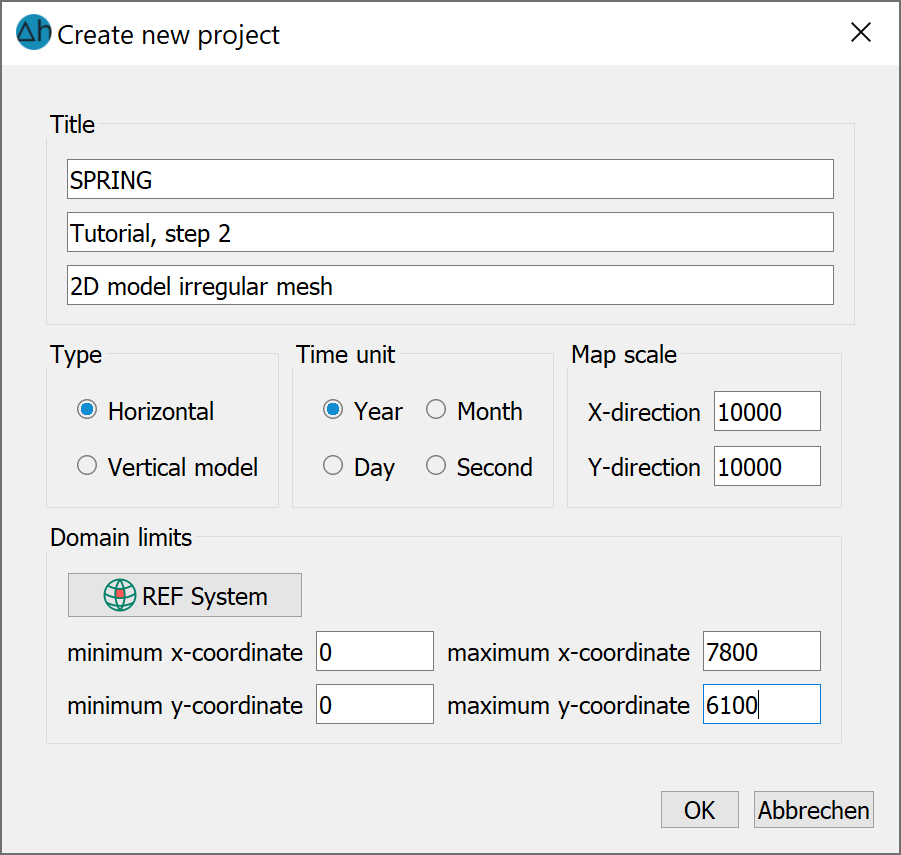
Coordinates of the new project
After confirming with the OK button, the project is created and should be saved with File Save as... and be named appropriately.
Stand: 06.05.2025 | 