The object menu is available both in the plot and model mode. It is identically in both modes. The following menu items are available:
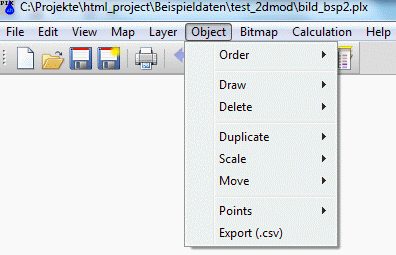
Order
The following submenu appears:
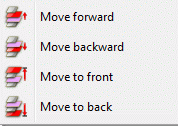
The four items allow a change in the position of individual objects in the order within their layer.
The functions Move forward or rather backward change the position of the object that it is represented more in the foreground (later) or more in the background (earlier) of the layer. The function Move to front puts the object into the foreground, i.e. it is represented last and covers all other objects in the layer. The function Move to back puts the selected object into the background of the map i.e. it is represented first and is covered by all other objects.
The order of representation for objects can be changed only inside the corresponding layer. Therefore, the function Move to front places the object in the topmost position of the corresponding layer and the function Move to back puts the object in the bottom position of the layer. To change the order of two objects belonging to different layers, you must use the corresponding functions for layers. Alternatively, you can merge all loaded layers to one layer.
Draw
The following submenu appears:
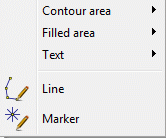

Flat, Filled area
There is a choice between these forms:

The menu item Flat draws only the outline of an area while the menu item Filled area draws an area filled with colour.

Text
The following selection is available:

When selecting the menu item Text new text is added to the layer. For this, first a position has to be set by clicking with the left mouse button. This will open a dialog window in which the desired text is entered.
Selecting the menu item Enlarge all texts all existing texts are automatically scaled larger.
Selecting the menu item Downsize all texts all existing texts are automatically scaled smaller.
If only a single text (or object) should be increased or decreased, this is done with the toolbar Object properties. This has to be displayed before via the menu View  Toolbars
  Object. With the button "Show Properties" (
 ) and selecting an object (left mouse button) the properties (colour, height, etc.) of the selected object are displayed in the toolbar. Then there can be entered, for example, a different height H for the text. The checkbox at the left side of H must be enabled, so that the height in the subsequent assignment of the object properties is changed. The assignment of the object properties is done by clicking on the button
  in the toolbar and then selecting the text to be changed with the left mouse button. This approach is possible for all objects.

Line 
The menu item Line allows you to enter a line with any number of points which are connected by straight lines. After selecting the menu item, the cursor is positioned on the starting point of the line by clicking the left mouse button. The cursor goes to the second point and marks it again by clicking the left mouse button. This procedure is repeated until all points of the polyline are entered. Pressing the right mouse button ends the function without defining a new point.
The application remains in the line drawing mode, until the function is ended with the right mouse button or another function is activated.

Marker 
With the menu item Marker symbols are placed at the selected location of the graphic by clicking the left mouse button. There are 35 marker types available. Markers are produced so long until the right mouse button or another function is activated. The symbols and their height are selected via the toolbar View  Toolbars
  Object properties. The toolbar is to be displayed before.
Delete
Using this menu item objects can be deleted individually ( ) or in a defined area (
 ) by clicking the left mouse button.
The deletion can be undone by the Undo function  or repeated by the Redo function
  .
.
Duplicate
This function creates a copy from an already existing graphic object. The corresponding object is identified with the cursor. In the appearing selection window the layer can be chosen in which the selected object is copied:
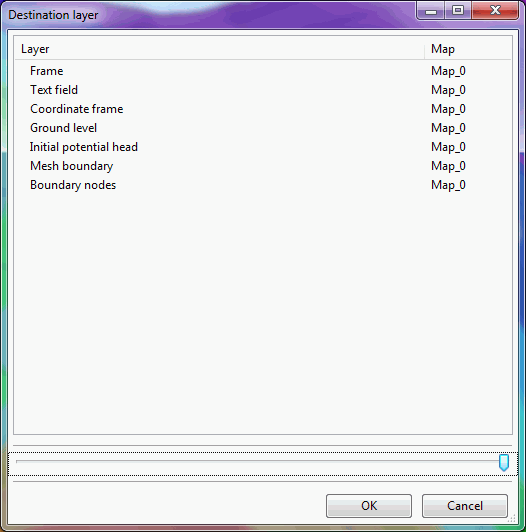
After activating the chosen layer in the project manager the duplicate can immediately be moved to the right position via the menu item Object  Move.
Move.
Scale
Using this menu item, an object can be scaled individually ( ) or in an area (
 ). After selecting one or more objects with the left mouse button and confirming them with the right mouse button the following input window appears:
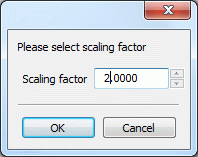
A scaling factor > 1.0 enlarges the objects, a factor between 0 and 1.0 makes the objects smaller.
The scaling can be undone by the Undo function  or repeated by the Redo function
  .
.
.
Move
Using this menu item objects can be moved individually ( ) or in an area (
 ). The desired object or the area are selected with the left mouse button and dragged to the desired location. When selecting an area it is important to note which layer is active.
Moving can be undone by the Undo function  or repeated by the Redo function
  .
.
Points
This menu item is used for editing line or polygon objects.
The following submenu appears:

Using the menu item Insert intermediate points can be inserted into existing polylines or polygon objects. The object is selected with the left mouse button and the points are marked at the desired location with the left mouse button.
The menu item Delete deletes the selected points from an existing object. For this, the object is selected first with the left mouse button. With further clicks of the left mouse button on the points to be deleted the object changes.
With the menu item Move the position of individual points of a line or polygon object can be changed. For this, the object is selected first with the left mouse button. By holding the left mouse button the point is moved. By releasing the mouse button, the point remains at the desired position.
The right mouse button ends each function for the selected object. By selecting with the left mouse button, a further object can be edited. To terminate the individual functions either a different function is called, or the right mouse button has to be pressed again.
Export *.csv
After selecting an object with the left mouse button, the file selection window appears, where the name of the *.csv file is set. In the file, the coordinates of the object are stored in the following manner:

Point object (e.g. marker ate wells): The coordinates of the centre of the marker are stored.

Line object: The coordinates of each line section are stored.

Area object: The coordinates of the corners are stored.
About another selection with the left mouse button a further object can be exported. To terminate the function either a different function is called, or the right mouse button has to be pressed again.
