The contours become nodes or element edges during mesh generation. The node spacing of the contours should therefore be checked in particular.
The contour menu can only be selected in model file mode. The following menu items are available:
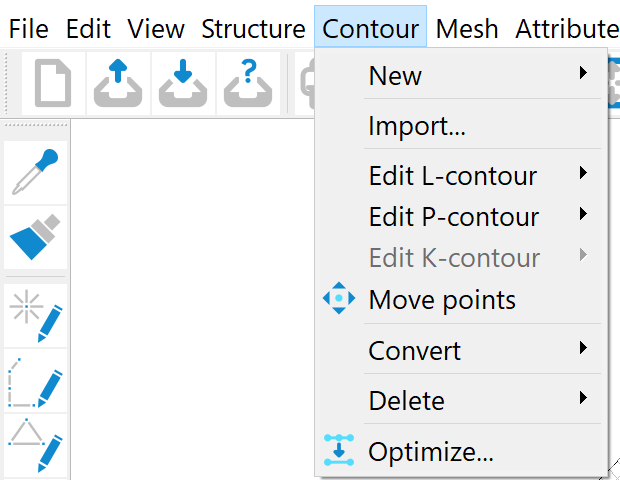
New
In the New submenu you first select which contour type (point, line or fracture contour) is to be created. Once the contour type has been selected, it can be created in the graphical user interface. It is possible to set the snap mode. Either the point can be free, a mesh node or a point can be snapped to
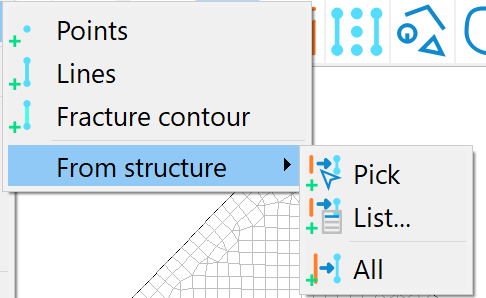
An existing structure can be converted into a contour by selecting it with From structure  Pick, with From structure List… or with From structure All. The following input window appears:
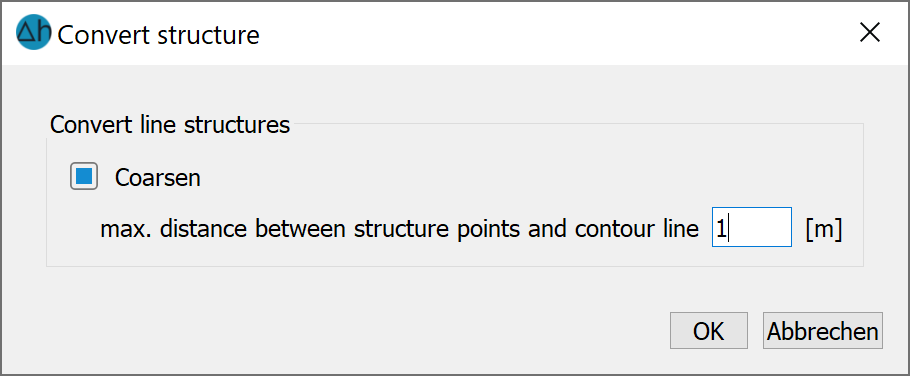
All structure points with a distance smaller than the entered distance to the generated line configuration are not taken into account .
Contours from coarsened line structures
The contours only inherit the geometric data (i.e. coordinates of the points of the lines) from the structures from which they are generated. After the transfer, the contour loses the reference to its original structure.
Edit l-contour
The length of a line contour can be changed in various ways. The following submenu appears:
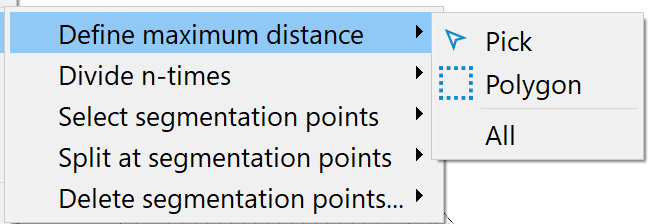
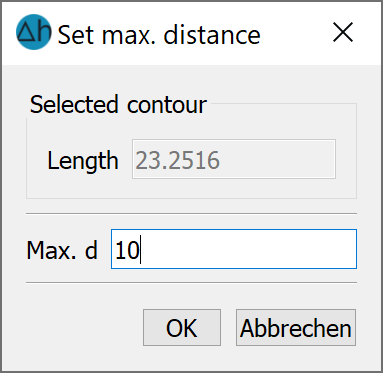
Set maximum distance:
After selecting this menu item, a single line contour can be picked, an area over a polygon or all line contours can be selected, within which the length of the l-contours is to be edited. After pressing the right mouse button, an input window appears in which the desired length is entered. If only one line contour is selected, the actual length is displayed and a new length can be defined. If several l-contours are selected within a polygon, the following window appears:
In this case, the minimum, maximum and average length of the selected l-contours are displayed and a new length can be selected.
Attention: All existing division points within the selected contours will be deleted!
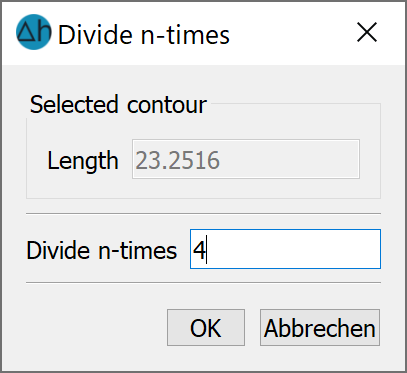
Divide n-times:
After selecting this menu item, one or all line contour(s) can be selected or an area over a polygon can be selected within which division points for the l-contours are to be defined. After pressing the right mouse button, an input window appears in which the desired number of division points is entered. If only one line contour is selected, the actual length is displayed and the number of desired division points can be entered.
If several l-contours are selected, a window appears with the statistical values of the selected contours:
By specifying the number of division points, the l-contours are divided equidistantly. All existing division points and any defined maximum distance between the selected contours are deleted.
Select segmentation points:
After selecting an l-contour (Pick) and confirming with the right mouse button, the desired division points can be selected with the left mouse button and confirmed with the right mouse button.
After selecting several l-contours within a Polygon, an l-contour can be selected, the desired division points can be assigned with the left mouse button and confirmed with the right mouse button. Then you can continue to the next l-contour for the assignment of the division points by selecting it with the left mouse button.
Split at segmentation points:
If one or more l-contours have been divided by segmentation points, these can also be converted into independent l-contours. The desired l-contour (Pick, Polygon, All) is selected, then by confirming with the right mouse button, the corresponding l-contours are split at their division points.
Delete segmentation points
All segmentation points can be deleted here. This menu item should be executed before l-contours are converted into fracture contours, as l-contours with division points will otherwise not be taken into account.
Edit p-contour
The well parameters for one or more p-contours can be set here:
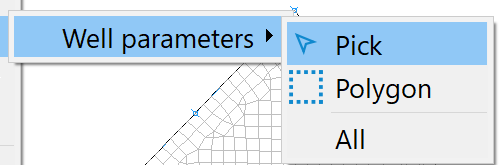
Explanations of this menu item can be found in the chapter "Building a 2D model - generating contours" and in the chapter: "Discretising locations: special case of well discretisation".
Edit k-contours
Due to its complexity, this menu item is discussed in detail in the chapter: "Creating fracture contours“.
Move points
After selecting this menu item, the snap mode window appears in which you can select whether the contour points are to be moved to free coordinates or to existing points (structure points or existing nodes.
Convert
When hovering on this item another submenu item appears:

After selecting this menu item, all (split) l-contours are converted to k-contours. The l-contours with division points are ignored.
Delete
The type of contours to be deleted can be selected in the submenu.
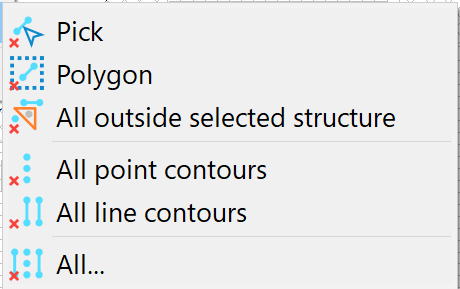
If one or more contours are to be deleted, the contour can be selected via picking or several contours can be selected via a polygon. The contours that fall outside of a specified structure can be deleted. It is also possible to delete all p-contours, all l-contours or all contours.
Optimize…
Before the contour can be taken into account when creating the mesh, it must be ensured that the contour is optimised, i.e:
Contour lines must not intersect.
Contour lines must not lie (partially or completely) on top of each other).
Contour points may only lie on contour lines if the corresponding contour lines also has a division/segmentation point at this point.
Contour points, contour lines start points, contour lines end points and segmentation points should not be too close to each other.
A closed outer contour edge must be available for the global node and element generation algorithms.
The individual contours are checked and optimised in this menu item. The distances are defined in the following input window:
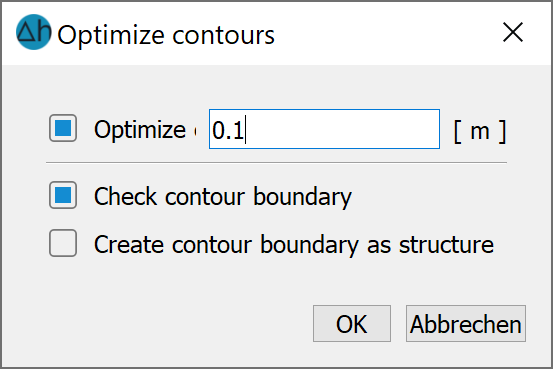
The contour points are merged if the existing distance is less than or equal to the specified value.
During optimisation:
Intersecting contour lines are divided at the crossing points.
Contour points on contour lines are matched by corresponding segmentation points on the contour line, and
Overlapping contour lines are separated and shortened.
Example of optimisation using overlapping and superimposed contours:
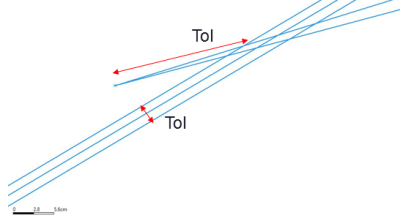
Before optimization
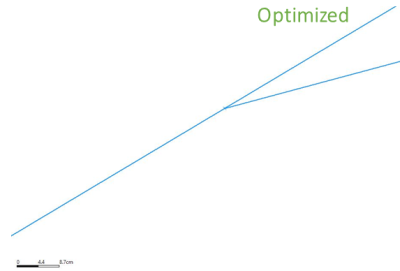
After optimization
Once this optimisation is complete, the outer contour edge is calculated. If this is successful, the message "Contour edge closed!" appears at the bottom of the screen. If this is not the case, an error message appears. In this case, the distance between the contour points must be edited accordingly, as no nodes can be created if the contour edge is not closed.
Alternatively, it is possible to check only the contour edge and save it as a structure.
Stand: 06.05.2025 | 