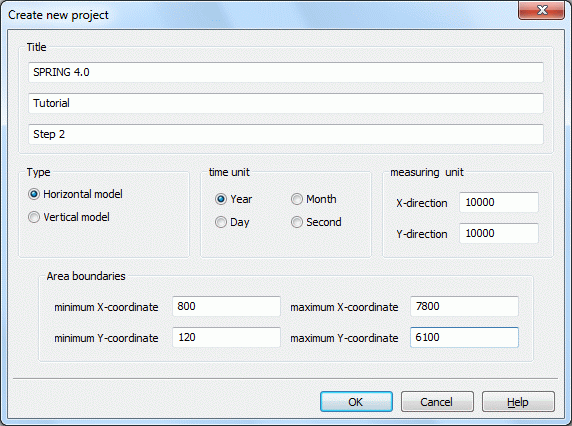
As described in Step 1 (regular mesh), for the creation of a new project the minimum and maximum coordinates of the study area are required.
Using File  Open
Open  Data type selection Bitmap (*.tif) you open the already saved file "topo1.tif" (directory: „…/Tutorial_bsp_files/Tutorial_2D_bsp_files/topo1.tif“).
The coordinates of the mouse pointer are displayed in the status bar of the screen.
The display area of the map can be moved by pressing the middle mouse button. By rotating the mouse wheel can be zoomed into or out of the presentation. Pressing the right mouse button takes you back to the long shot.
The coordinates of the topographic map and the selected model boundary can thus be determined for
the lower left corner of the map to x = 800, y = 120 and for the upper right corner of the map to x = 7800 y = 6100.
To return to the mode model file SPRING is opened again. In the dialog File  New the three comment lines and the coordinates determined for the boundaries are entered:

Coordinates of the new project
After confirming with the OK button the project is created and should be named with File  Save as….
 Creating and importing structures
